Chocolate Tiramisu and Exciting News!

**note this post was written a week or two ago, I've just been lazy about getting the pics uploaded!**

Happy spring, everyone!  Over the past week we've been pummeled by tornado warnings, thunderstorms, and just a lot of crazy weather in general...so I guess spring has really sprung!  But more importantly, let's start with the exciting news...

It's a......GIRL!!


Woohoo! :) There's my little munchkin, all snug in her temporary apartment (I hear the landlord is AWESOME).  Even though I get bombarded with inappropriate comments from strangers all the time ("Wow, that's going to be a BIG baby!"  "Are you sure it's not twins?!"), I'm still elated to be pregnant, and SO excited to meet this little one!


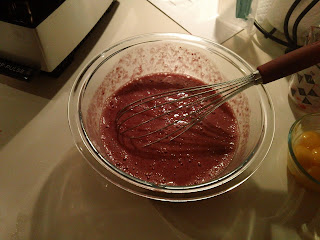
Anyway, let's get around to the food part.  Chocolate tiramisu anyone?  I made this for Easter and it was a HUGE hit!  At first I thought I'd give homemade ladyfingers a try since I found a recipe on Annie's Eats a while back, but then I decided it was overly ambitious and that I'd just buy some from the store.


Then I went to the store the day before Easter.  Woops!  Giant didn't have them, Eastern Market Bakery didn't have them, Yes! Organic Market didn't have them...no one!  Sooo I marched over to Hill's Kitchen, bought a silpat, and forged on.  Yes.  I made my own ladyfingers...and didn't screw them up!!!  Winner winner, chicken dinner!

The ladyfingers turned out to be easy and fantastic.  They were a little sticky (it was also hot and humid when I made them, so that could have contributed), and they soaked up the coffee fast.  Definitely only needs a very quick dunk and placement straight into the mousse, otherwise I think they'd disinigrate pretty quickly.  The only thing I would do differently is double the recipe.  The original said it would yield over 30 ladyfingers, and somehow I only eeked out about 20.  For a tiramisu this size, I would have doubled this, and put a double layer of ladyfingers between the layers of mousse.  This still turned out fine, but just if I had my druthers, you know. 


The chocolate and coffee flavor at the end was divine!  I tried to top it and make it pretty with the mascarpone like they did in the Bon Appetit article, but the mascarpone was just too thick for the mousse.  Instead I swirled the top layer of mousse and the mascarpone together, then topped it with some fresh whipped cream and chocolate shavings.  We all ate it, and all loved it!  I would definitely make this again.  So easy, especially since I made it a day ahead and just let it sit overnight, and so delicious!  Here's the recipe breakdown:

from Annie's Eats
Ingredients:
  • 3 large eggs, separated
  • ½ cup confectioners’ sugar, sifted, plus more for sprinkling
  • 1/3 cup granulated sugar
  • ½ cup all-purpose flour
Directions:
To make the lady fingers, place the egg whites in the bowl of an electric mixer fitted with the whisk attachment.  Beat on medium-high speed until foamy.  Gradually add the sifted confectioners’ sugar, and continue whipping the egg whites until a stiff, glossy meringue forms.  Transfer the meringue mixture to a medium mixing bowl.  In the empty mixer bowl, now fitted with the flat beater, combine the egg yolks and granulated sugar.  Beat on medium speed until thick and pale yellow.  With a spatula, fold the egg yolk mixture into the meringue until smooth and blended, taking care not to deflate the egg whites.  Gently fold in the flour until no streaks remain.

Preheat the oven to 375˚ F.  Line two baking sheets with parchment paper or silicone baking mats.  Transfer the batter to a pastry bag fitted with a plain round tip.  Pipe the ladyfingers onto the prepared baking pans, about 3 inches long and 1 inch wide.  Sprinkle additional confectioners’ sugar over the piped ladyfingers.  Bake until light golden, about 10 minutes, rotating the pans halfway through baking.  Let cool on the pans 10-15 minutes, then remove the ladyfingers and cake bases to a wire rack to cool completely.  (Yield: approximately 20 ladyfingers

Chocolate Tiramisu
Adapted from Bon Appetit Magazine, May 2011 issue
Ingredients:
Espresso Syrup
  • 1 1/2 cups espresso or strong coffee
  • 1/4 cup sugar
Tiramisu
  • 1 3/4 cups mascarpone cheese, divided
  • 2 Tbsp. plus 1/2 cup sugar
  • 1/4 tsp. vanilla extract
  • 1/2 tsp. unflavored gelatin
  • 4 large egg yolks
  • 1 cup chilled heavy whipping cream, divided
  • 6 oz. bittersweet chocolate (do not exceed 61% cacao), chopped, plus more for shaving
  • About 48 soft ladyfingers

Preparation

  • Stir espresso and sugar in a small bowl until sugar dissolves; set aside.

  • Combine 1 cup mascarpone, 2 Tbsp. sugar, and vanilla in a small bowl and whisk to blend; cover and chill.
  • Place 1 Tbsp. water in a small bowl. Sprinkle gelatin over. Let stand until gelatin softens, 10-15 minutes. Whisk the remaining sugar, yolks, 1/4 cup cream, and 1/4 cup water in a medium metal bowl to blend. Place bowl over a large saucepan of boiling water (do not let bottom of bowl touch water) and whisk constantly until custard thickens and temperature reaches 160° on an instant-read thermometer, 3-4 minutes. Remove bowl; add gelatin mixture and whisk until dissolved, 15-20 seconds. Return bowl over water, add chocolate, and whisk until almost melted, about 30 seconds.
  • Set bowl in a large bowl of ice water and whisk until chocolate is melted and custard is cool, 5-6 minutes. Whisk in the remaining mascarpone. In another medium bowl, beat remaining 3/4 cup chilled cream until firm peaks form. Fold cream into custard in 2 additions to make a chocolate mousse.
  • Spread a thin layer chocolate mousse in bottom of large glass dish. Dunk ladyfingers in the espresso syrup and arrange in a single layer on top of the mousse. Repeat layering with chocolate mousse and soaked ladyfingers. Swirl mascarpone mixture with top layer of mousse.  Top with fresh whipped cream, if desired. Garnish with chocolate shavings and serve.

Whoopie!!

It's the first day of spring!  So I thought after the beautiful sunny weekend we had here in DC, whoopie pies would be quite appropriate.  It's 9:51PM and since I'm preggo, I'm exhausted!!  If it's alright with you guys, I'm going to keep this post short and sweet, and just leave you the recipe with some good pics. 

Chocolate and Marshmallow is the classic whoopie pie flavor, and I'm a HUGE fan of the whoopie pies that Red Hook Lobster Pound sells on their food truck (along with some ridiculously amazing lobster rolls, of course), so I was excited to try my hand at making some from scratch.  The most interesting thing about whoopie pies is that the outside is a mix between a cake and a cookie.  The batter was exactly somewhere in between, and made for interesting scooping.  I went out this weekend and bought a #40 cookie scoop from Hills Kitchen, and I would venture to say it was the best decision ever.  The size of the batter dropped onto the pan was about the size of a silver dollar (do people even know what that size is anymore?!), and it easily doubled (if not more).  If you were to use an ice cream scoop, it would be fine, but you would have pies almost the size of your whole hand.  Depends on what you want!  This size (maybe the size of my palm or smaller) made about 50 pies.

So give it a go!  Make some whoopie pies, and say, "WHOOPIE!!!" to spring!!  But first, let me tell you about my little system...


Every time I buy powdered sugar, I think two things.  The first, I think of my Mom.  Somehow every time my Mom bakes, she buys more powdered sugar.  This results in about 4 or 5 half opened powdered sugar bags in her pantry, rolled up, tied with rubber bands, and tucked away to be forgotten for the next trip.  It cracks me up!  So when I moved into my first apartment, and started baking, I found myself doing the same thing!  All of the sudden there were three half-full powdered sugar bags in my pantry, rolled up, and poofing out little spurts of powdered sugar every time something was set on top of them.  Finally I realized this was ridiculous, so I bought a big box of gallon-sized freezer bags, and voila!


I'm a genius!  If I buy an extra bag? No big deal, just add it to the freezer bag!  It doesn't tear when I measure out of it, I'm always aware of how much I have left, and there's no need to have an annoying lump in my cupboard taking up awkward space.  Okay, so enough preaching.  Just a little idea I thought I'd share (with you, too, Mom!). 

On to the recipe!  This one comes from Annie's Eats.  I know you know I have a tendency to obsess when I find a food blog I love, and this one is no different.  Check her out!!

Chocolate Marshmallow Whoopie Pies
Yield: about 24 sandwich cookies (mine made about 50 small pies)

Ingredients:

For the cookies:
  • 3½ cups all-purpose flour
  • 1 tsp. salt
  • 1½ cups unsweetened cocoa powder
  • 1 tbsp. baking soda
  • 1 tsp. baking powder
  • 1 cup (2 sticks) unsalted butter, room temperature
  • 2 cups sugar
  • 2 large eggs
  • 2 cups buttermilk, at room temperature
  • 2 tsp. vanilla extract
For the filling:
  • 1 cup (2 sticks) unsalted butter, at room temperature
  • 2 cups confectioners’ sugar, sifted
  • 7½ oz. marshmallow fluff
  • 2 tsp. vanilla extract
Directions:

 
Preheat the oven to 400˚ F. Combine the flour, salt, cocoa powder, baking soda, and baking powder in a medium bowl; whisk together to blend. Set aside. Line two baking sheets with silicone baking mats or parchment paper. In the bowl of an electric mixer fitted with the paddle attachment, combine the butter and sugar. Beat together on medium-high speed until light and fluffy, 2-3 minutes. Beat in the eggs one at a time, blending well after each addition. Blend in the buttermilk and vanilla extract until incorporated. Mix in the dry ingredients, blending just until combined.

 
Using a 1-oz dough scoop, drop the batter onto the prepared baking pans, 12 cookies per pan. Bake for 12 minutes, rotating the pans halfway through baking. Allow to cool on the pan 5-10 minutes, then transfer to a wire rack to cool completely. Repeat with the remaining batter.

 
To make the filling, place the butter in the bowl of a mixer fitted with the paddle attachment. Beat on medium-high speed until smooth, 1-2 minutes. Blend in the confectioners’ sugar until incorporated. Beat in the marshmallow fluff and vanilla until light and fluffy, 2-3 minutes.

 
Once the cookies are completely cooled, match them up in pairs by size. Fill a pastry bag fitted with a plain with the marshmallow filling. Pipe a dollop of marshmallow filling onto the flat side of one cookie of each pair, and sandwich the cookies together, pushing the filling to the edges. Store in an airtight container.

 
Source: cookies and filling from Martha Stewart


Strawberry Ice Cream and My Favorite Cake

Last week I gave you a teaser about strawberry ice cream, when I had leftover strawberry puree and eggs yolks from the strawberry cupcake recipe. Here I am, delivering on that promise!  As an extra bonus, you get my favorite recipe for the best pound cake you've ever tasted.  It's my favorite cake because I always have almost all of the ingredients, it's consistently delicious, and it's so quick and easy!  Literally...I have memorized the recipe, and could probably make it with my eyes closed!

What I'm not delivering on: photos!  I made the ice cream Friday night after work, quickly before Jeff and I went out for dinner and frozen custard.  Then I finished it in the ice cream maker Saturday morning quickly before we dashed out to Madame Tussaud's.  Then on the way back, I decided to make the pound cake to bring with the ice cream to our friends' house that night, so I dashed to the store for heavy cream and then quickly home to throw it together before we were supposed to get over there (it takes 1 hr and 15 min to bake!).  So there was a lot of dashing, and going quickly, and it didn't even dawn on me to take photos, or that I would even blog about it!

That was until we tasted them.  Ooh my goodness.  The pound cake?  Divine.  Literally still hot from the oven, I brought it to our friends' house still wearing oven mitts!  It smells like a gigantic sugar cookie, and tastes like sugar cookie cake, if there were such a thing.  Combine it with the fresh, creamy, strawberry-licious ice cream?  It was like summer on a plate!!

The cake recipe comes from one of my favorite authors, Dorothea Benton Frank, and her book Shem Creek.  All of her books are set in Charleston, SC, and make you completely want to pick up and move to the South.  The recipe is perfect, and I can tell you that I will never (NEVER) look for another recipe!  Seriously...it's perfect. 

So since I have no photos for you, how about I just give you the recipes, so you can go make these as soon as possible?

Fresh Strawberry Ice Cream
by Emeril Lagasse, from Food Network

Ingredients
  • 1 quart fresh strawberries, washed, stemmed and quartered*
  • 1 1/2 cups granulated sugar
  • 4 cups half-and-half
  • 1 cup granulated sugar
  • 1/2 vanilla bean, split in half and scraped*
  • 6 egg yolks
Directions

In a food processor or blender, combine the strawberries and 1/2 cup of the sugar. Process until smooth. In a saucepan, over medium heat, combine the half-and-half and sugar. Bring to a simmer. In a small mixing bowl, whisk the egg yolks until smooth. Add 1 cup of the hot liquid to the egg yolks and whisk until smooth. Add the yolk mixture to the saucepan of liquid and whisk until incorporated. Bring the liquid back to simmer and continue to cook for 4 to 6 minutes or until the mixture coats the back of a spoon. Remove from the heat and stir in the strawberries. Whisk until smooth. Pour the mixture into a glass bowl and place a piece of plastic wrap directly on top of the mixture. This will prevent a skin from forming while cooling. Cool the mixture completely. Process the mixture according the ice cream machines instructions.

*As I mentioned, I used the leftover strawberry puree from the cupcakes I made for Valentine's Day, so I was unable to measure our strawberries in this way for the puree in the recipe.  I had about a pint glass full of puree, just stirred the sugar in (didn't blend it again), and it tasted great.  I also just used vanilla extract (about a teaspoon or two, I just eyeballed it), and added it after the strawberries while it was off the heat.

Vanilla Pound Cake
from Dorothea Benton Frank's novel, Shem Creek

Ingredients
  • 3 cups plain flour - not self-rising
  • 2 sticks salted butter
  • 3 cups sugar
  • 1 cup heavy whipping cream
  • 6 large eggs
  • 2 tablespoons vanilla

Directions
Preheat oven to 325 degrees.

Generously grease and lightly flour a tube pan. Sift flour three times.
Cream butter with sugar until light and fluffy. Add eggs, one at a time. Beat only until each disappears. Blend in 1 cup flour followed by 1/2 cup whipping cream. Repeat with 1 cup flour and 1/2 cup whipping cream. Add remaining flour. Fold in vanilla.
Add batter to pan, level it and drip it flat on the counter to knock out the air bubbles. Place in center of the oven and bake for an hour and fifteen minutes, or until it's browned on top and begins to pull away from the sides of the pan (important!). Remove from oven. Wait ten minutes and invert on a cake plate. Do not cover until cool to touch.

As a bonus, here are some fun photos from our trip to Madame Tussaud's.  Hope you get the day off tomorrow like we do!!

 On the Delaware with Washington
 I am not a crook!
 Can you smell what the Rock is cookin?!
 J. Lo's booty's got nothin on mine!
 Thrilla!!
Jeff takes a Tyson-sized bite out of Holyfield 

Be Mine?

I've been dreaming about these cupcakes for a couple weeks now.  I saw this recipe for strawberry cake a couple weeks ago, and the gears started turning.  Here was my train of thought...

Strawberry cake--> pink--> Valentine's Day!--> hearts! --> chocolates!--> OH MY GOD. CHOCOLATE COVERED STRAWBERRY CUPCAKES!

So before I knew it was writing on Facebook to my friend Leah, who own's my fave kitchen store, Hill's Kitchen, asking for heart-shaped cupcake molds.  I got the last set in the store!  I ordered another set from Amazon, and then started talking about these hypothetical cupcakes to all of my coworkers.  So tonight was the night.  Tomorrow's the big day for all you lovaaahs out there!  Maybe make your valentine some sweet cupcakes to show your love!

There are some great things and not-as-great things about this cake.  Not so great? Waiting for strawberries to thaw, separating egg whites, making strawberry puree.  Great? Leftover strawberry puree, juice, egg yolks...can someone say ice cream?!  I'm really hoping to find a good recipe in the next couple days.  Anyway!  Cupcakes!


I'll warn you now, this batter is SO good.  I walked into our living room, where Jeff was watching TV, holding the bowl of batter and said, "Okay. I know I'm pregnant. I know this has raw egg whites in this, so I shouldn't eat it. But I did. And oh. my. gawd.  It's SO good!!!"  It tastes kind of like strawberry ice cream!  Delish!  When you get caught in the kitchen with your finger in the bowl, don't say I didn't warn you!

The original recipe, below, featured a champagne buttercream (wow!) but I thought it would be so delicious to just dip these in chocolate ganache, like a chocolate-covered strawberry.  Plus, they are perfect for the heart-shaped molds!  These cakes would be so excellent with any type of frosting, though.  I think it might be my new favorite recipe!  Dee-lish!


Adapted to cupcakes from Cook Like a Champion

Makes about 24 cupcakes

Ingredients:
For the strawberry purée:
  • 24 ounces frozen strawberries, thawed

 For the cake:
  • 3/4 cup strawberry purée, room temperature
  • 1/4 cup milk, at room temperature
  • 6 large egg whites, room temperature
  • 1 tablespoon vanilla extract
  • 2 1/4 cup cake flour, sifted
  • 1 3/4 cup sugar
  • 4 teaspoons baking powder
  • 1 teaspoon salt
  • 12 tablespoons unsalted butter (1 1/2 sticks), softened
Directions:

 
To make the strawberry purée, pour thawed strawberries into a fine mesh strainer set over a large bowl to remove any liquid. Save liquid for a later use or discard. Purée strawberries in a blender or food processor and set aside 3/4 cup for the cake. The remaining 1/2 cup can be used to fill the cake, top ice cream, make daiquiris or almost anything else you can think of.

 
To make the cake, preheat oven to 350º. Prepare a cupcake pan, either with paper liners, cooking spray, or use silicone molds like mine on a baking sheet. In a small bowl, whisk together strawberry purée, milk, egg whites and vanilla. In the bowl of a stand mixer fitted with the paddle attachment, combine flour, sugar, baking powder and salt on low speed. Add butter and continue mixing until the mixture resembles coarse crumbs. Add the purée mixture and beat at medium speed until smooth, scraping down the sides and bottom of bowl as needed. Divide the batter evenly among the pans (a kitchen scale works wonders here) and smooth tops with a rubber spatula.

 
Bake cakes for about 16 minutes, or until a toothpick inserted in the center comes out clean. Cool cakes in molds for 10 minutes, then turn onto a wire rack to cool completely.

For the Ganache:
•4 oz semisweet chocolate, chopped (I just used chips, unchopped. Mini chips would be even better)
•1/2 C heavy cream
•2 Tbsp light corn syrup

To make the ganache, put the chocolate in a small mixing bowl. Combine the cream and the corn syrup in a small saucepan and bring to a boil. Pour over the chocolate right away, and stir slowly until all of the chocolate melts and the ganache is silky and shiny. (It takes a while! Be patient and keep stirring, it will get there!).

Dip the top of each cupcake in the ganache, tapping gently to remove the excess. Return the cupcakes to the wire rack to let the glaze set up, at least 30 minutes.

The cupcakes can be kept in an airtight container in the refridgerator for up to 3 days.

The finished product got the hubby seal of approval, so you KNOW they're good!


 And just for kicks, here's a pic of me and my valentine from the Capitals game on Saturday (in our new jerseys!).  Happy Valentine's Day everyone!


Buns in Ovens

Are you excited? Have I piqued your interest?  Hmm...that's cool.  Now let's talk cinnamon rolls.  That is definitely one good type of bun that comes out of an oven.  Hot, gooey with frosting, everyone loves a cinnamon roll!  Would I make them again?  I'm not sure.  Here's why...

I've had this Smitten Kitchen recipe for Cinnamon Rolls for so long.  Seriously.  Probably something like a year.  But MAN is it time intensive!  It's what really turns me off about breads and buns...all that rising time!  Truth be told, I love (LOVE!) those cinnamon rolls in a can, with the little pot of icing at the bottom.  It's Christmas tradition in our family to make those every year, and I have to hold myself back from eating 5!  Why bother with something that takes HOURS to make?!  So you may be asking, where did these go wrong?

They didn't!


I did everything correctly.  I started my dough on Saturday morning, refridgerated it overnight, and brought it out to room temp (err...kind of...it was room temp enough...kind of...) Sunday morning before our friends in from out of town woke up.  The dough rolled out beautifully.  My new bread knife from my in-laws for Christmas was AMAZING.  Sliced through the dough like a hot knife through butter.  There's my big tip for the whole process: use a sharp knife to cut your dough into rolls.


They cooked up nicely, didn't burn, and everything worked out exactly how it should have.  My husband loved them.  Our friends loved them.  Why didn't I love them?  Well that would be the second bun in the oven I'm referring to...


This little stinker doesn't seem to like Mommy to eat very much lately!  Yep...I'm pregnant!  That tiny little speck in there is a 7 week old bun (who is actually about 9 weeks now).  Our sweet little Bun (yes...we call it "The Bun") is due in September, and we couldn't be happier!!  It's definitely been an interesting month since I've found out, and morning sickness currently has had me in it's death grip until the recent acquisition of a little miracle drug called "Zofran."  I managed one bite of roll, and had to put it down.  Tragedy of tragedies!!  Who puts down a perfectly good cinnamon roll?!  The answer is me.

So from what I gather, these rolls were delicious.  It's up to you to be the judge now!  Also, check out Smitten Kitchen's post for these rolls.  She announced her pregnancy through these rolls, too!  I figured if it worked for her, it works for me!


Cinnamon Rolls
From SmittenKitchen.com

Cinnamon Swirl Buns with Cream Cheese Glaze
Adapted from
Molly Wizenberg’s recipe in Bon Appetit, March 2008
Makes 18 buns. Note I did not say “servings”. That’s between you and your buns.
Dough
1 cup whole milk
3 tablespoons unsalted butter
3 1/2 cups (or more) unbleached all purpose flour, divided
1/2 cup sugar
1 large egg
2 1/4 teaspoons rapid-rise or instant yeast (from 1 envelope yeast)
1 teaspoon salt
Nonstick vegetable oil spray


Filling
3/4 cup (packed) golden brown sugar
2 tablespoons ground cinnamon
1/4 cup (1/2 stick) unsalted butter, at room temperature
Pinch of salt


Glaze
4 ounces cream cheese, at room temperature
1 cup powdered sugar
1/4 cup (1/2 stick) unsalted butter, room temperature
1/2 teaspoon vanilla extract


For dough: Combine milk and butter in glass measuring cup. Microwave on high until butter melts and mixture is just warmed to 120°F to 130°F, about 30 to 45 seconds. Pour into bowl of stand mixer fitted with paddle attachment. Add 1 cup flour, sugar, egg, yeast, and salt. Beat on low speed 3 minutes, stopping occasionally to scrape down sides of bowl. Add additional 2 1/2 cups flour. Beat on low until flour is absorbed and dough is sticky, scraping down sides of bowl. If dough is very sticky, add more flour by tablespoonfuls until dough begins to form ball and pulls away from sides of bowl. Turn dough out onto lightly floured work surface. Knead until smooth and elastic, adding more flour if sticky, about 8 minutes. (You may also use a KitchenAid’s dough hook for this process.) Form into ball.
Lightly oil large bowl with nonstick spray. Transfer dough to bowl, turning to coat. Cover bowl with plastic wrap, then kitchen towel. Let dough rise in warm draft-free area until doubled in volume, about 2 hours.

For filling: Mix brown sugar, cinnamon and pinch of salt in medium bowl.
Press down dough. Transfer to floured work surface. Roll out to 15×11-inch rectangle. Spread butter over dough, leaving 1/2-inch border. Sprinkle cinnamon mixture evenly over butter. Starting at the longer side, roll dough into log, pinching gently to keep it rolled up. With seam side down, trim ends straight if they are uneven (we baked them in a ramekin, incapable of discarding such deliciousness) cut remaining dough crosswise with thin sharp knife (a good serrated worked well here) into 18 equal slices (each about 1/2 to 3/4 inch wide).
Spray two 9-inch square glass baking dishes (an 8-inch square metal pan worked just fine, too) with nonstick spray. Divide rolls between baking dishes, arranging cut side up (there will be almost no space between rolls). Cover baking dishes with plastic wrap, then kitchen towel. Let dough rise in warm draft-free area until almost doubled in volume, 40 to 45 minutes, though yours, like mine, may take longer. Don’t skimp on the double-rising time.
Position rack in center of oven and preheat to 375°F. Bake rolls until tops are golden, about 20 minutes. Remove from oven and invert immediately onto rack. Cool 10 minutes. Turn rolls right side up.

For glaze: Combine cream cheese, powdered sugar, butter, and vanilla in medium bowl. Using electric mixer, beat until smooth. Spread glaze on rolls. Serve warm or at room temperature.

Note: These buns were best the day they were baked. The second day, they were on the tough side. If you anticipate wanting them over a few days, glaze them to order, heating the buns beforehand to soften them up.

Okay, me again.  My other tip would be to roll the dough relatively tight.  I noticed that a couple of my rolls had a decent amount of filling fall out after slicing them.  I think the easy solution would be to roll the log tighter, and it shouldn't be a problem.  So now you have it.  Sharp knife, roll the dough tight.  Now go make some buns (cinnamon or babies...whichever you prefer!)!
Write here, about you and your blog.
 
Copyright 2009 Give Me Some Sugar All rights reserved.
Blogger Templates created by Deluxe Templates
Blogspot Templates From Wordpress Theme by EZwpthemes